Veneer Dining Table Repair
**Heads up: This post contains affiliate links. As an Amazon Associate I earn from qualifying purchases. Meaning I may receive a small commission-- at no cost to you, of course-- were you to make a purchase through any of the links. If I link to a product, I use it, I love it, and I think you would too! Please see my Privacy Policy for more details.
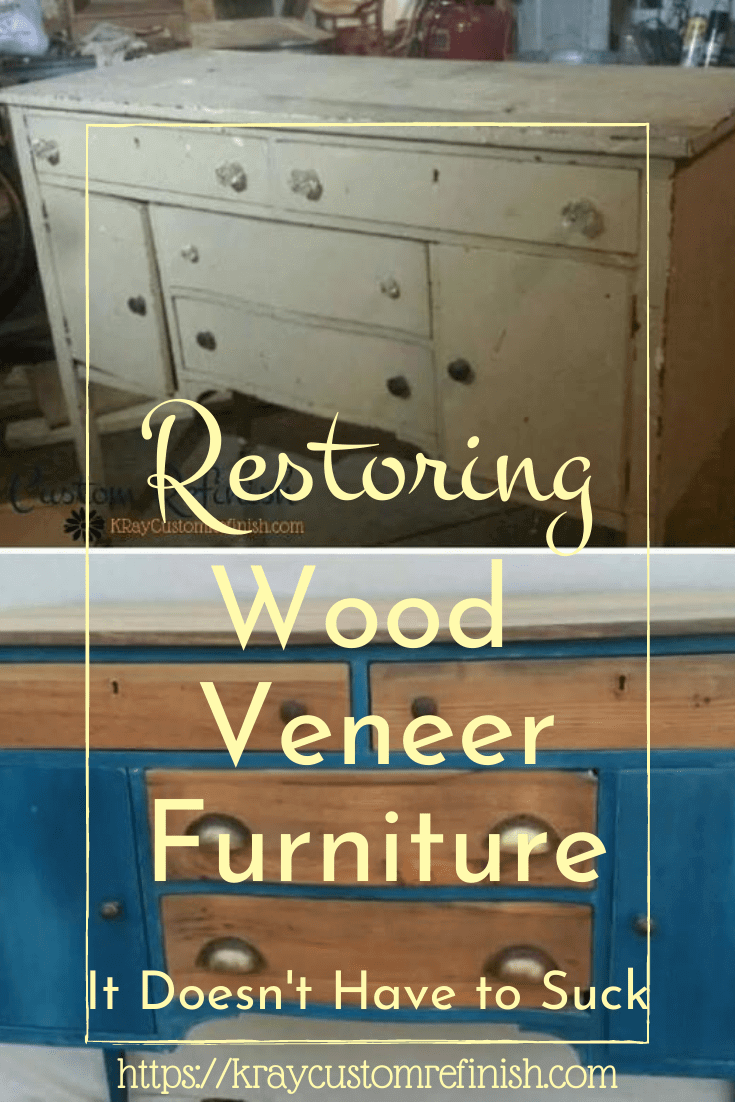
There once was a time period, in which furniture makers decided to cover their wood furniture with a thinned piece of a DIFFERENT (sometimes less beautiful) piece of wood. Why?
I couldn't tell ya. Most likely because it was cheaper to use a pinewood base and cover it with a tiny bit of some other solid wood.
Thankfully, times have changed, and today I'm going to show you a few awesome techniques for restoring wood veneer furniture!
So the next time you skip by a piece at the thrift store or think about tossing that dresser you've had in the attic for years…DON'T DO IT!!!
There are so many things you can do with a piece covered in wood veneer
1 – Repair the wood veneer. If most of it is in good shape, sand the chips down, fill cracks, iron out bubbles, and paint it!
2 – Change your piece around! Drawers? Take em out! Top? Replace with tile or stone? We'll get more into that in a few.
3 – Remove the veneer – I know, I know. This is not fun at all, but I have found a way to remove wood veneer that actually isn't so horrible.
Firstly, we want to determine if the piece is covered in wood veneer at all.
After gaining some experience, you can usually determine this by picking it up.
Wood veneer covered furniture is usually a lot lighter than solid wood, and just has an all-around more sturdy feel.
If you're contemplating purchasing the piece, and can't take a piece of sandpaper to it or take it apart, your best bet is examining the wood grain.
Wood veneer usually has a very subtle wood grain, without any serious carvings or differences. It almost has a pattern to it, as it is just strips set next to each other and glued.
The entire piece is normally covered with wood veneer as well, including underneath. So looking under it or removing a drawer will usually tell you as well.
If it's a vintage piece, try to find a spot where the wood veneer is bubbling or lifting up from water damage or age.
If you already own the piece and want to find out; break out the sandpaper!
Try an area that's hidden or less visible on the piece. If the piece is painted, lightly sand the edge down so that the wood is visible.

Usually, as in the image above, you should see a line about 1/8″ in where the wood veneer meets the wood or particleboard. If you take a 6 in 1 tool or putty knife and slide it in between the two, the wood veneer should lift up.
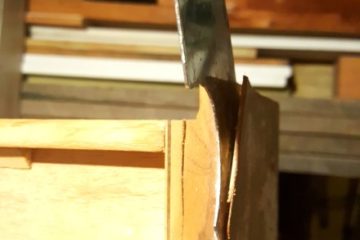
If you don't see a line and aren't able to lift anything up, then your piece is most likely hardwood! At least in that spot…You are going to want to test a few different areas on the piece to be sure it's all hardwood.
Techniques For Restoring Wood Veneer Furniture – The Choices Are:
Choice # 1: Repair the Wood Veneer
If the wood veneer is in pretty good shape, you could forgo the removal altogether and just repair damaged areas of the veneer.
Normal wear and tear on wood veneer will mean lifting edges, bubbles from water spills, cracks, and chips.
A Whole Bunch of Glue, A Sander, and Some Paint Can Fix it up Nicely
If you do go this route, you're better off just painting the piece once repairs are finished. So basically you're looking to insure the piece is structurally sound, and any repairs can easily be covered with paint.
(Some wood filler or glue repairs can be stained instead of painted with a few tricks I talk about in my Staining Wood Filler Post, but staining wood veneer is not recommended either way.)
Cracks & Chips – Sand down the edges and anywhere that you will be filling so that the wood filler has something to stick to.
If the crack is large enough to have completely separated, use wood glue first to close the crack together.
Clamp the two sides together with these clamps or something similar:
Let the glue dry for at least 24 hours before removing the clamps.
Then make sure the area is free of paint, dust, and debris before applying the filler.
Use a putty knife to fill in the rest of the cracks, chips, and gauges. Be sure to overfill the area so that you can sand it down to smooth once it dries.

Bubbles and Blisters: If there are large bubbles in your veneer, use a razor blade to slice a line down the center of the bubble. Then fill the flattened area with some wood glue, and heat it with either a heat gun or blow dryer. Use a putty knife to flatten it down.
Basically, do what you have to in order to secure and flatten any damaged veneer.
You can sometimes find matching wood veneer for repairs, but if you plan to cover it with paint it shouldn't matter either way.
Once the repairs are complete, sand it all down with some 220-grit sandpaper until it's uniform, and paint it normally.
Or paint it abnormally! Have a spot to hide that you sanded through perhaps? Check out what I did to a Queen Ann Side Table I accidentally sanded through the veneer top on.
A Faux Marble Painted Finish covered it up perfectly!
Need Help Organizing All of Your DIY Projects? Head over to my DIY Resources Page, download the DIY Project Planner Pages, and get organized!
Choice #2 Switch it up a Bit!
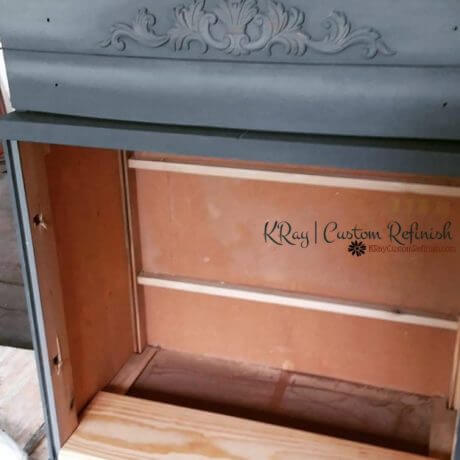
This was my choice for the most recent dresser I've been working on. we had a little trouble removing the wood veneer on a few of the drawers so we decided to just get rid of them.
Scott got some nice pine boards that were meant for flooring and lined the inside after we ripped out the drawer slides. Then he put one straight across the middle for a shelf.
We painted the rest of the piece and it came out beautifully!
It was nice doing it this way because I got a chance to put tea on the wood after sanding it perfectly. Then stained them before he installed them. To learn more about why I always use black tea before staining wood, you can check out my preparing wood for staining article.
Other options for switching it up would be, to change out the top of a tabletop that's covered in wood veneer with another top. You can use tin, tile, stone, or even marble depending on how expensive you want to go with it.
If the wood veneer is still in good shape, but you don't want to paint, you could also decoupage the area for something different.
I will also be doing a tutorial on Decoupaging in the near future. Subscribe to my newsletter to get that update!
Choice #3: Remove the Wood Veneer
This method is the one I use most often. It's definitely not the most fun method, but when you get to the wood underneath – it all becomes worth it.
Before you begin the step of removing the wood veneer, you need to be sure that it's hardwood underneath.
Determining Particle Board vs. Hardwood
Sometimes you get lucky and the entire piece is hardwood. But a lot of pieces end up having parts that are hardwood, and other parts (like the drawers or sides) are particleboard or plywood.
If instead of just 1 top layer of 1/8″ thick wood veneer, you see multiple small layers throughout the piece of wood, you're most likely looking at plywood.
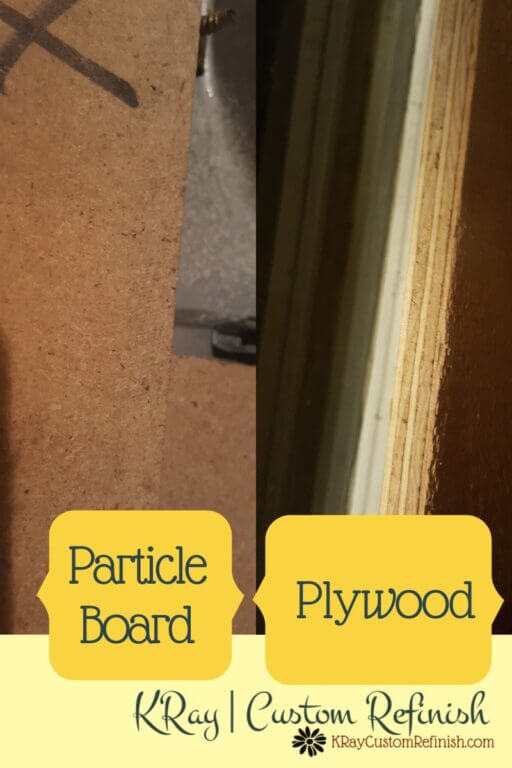
Plywood is basically multiple pieces of veneer glued together with grains alternating for strength.
If you see what looks like a bunch of tiny pieces of wood all smushed together and then glued….that is particleboard.
Normally I wouldn't recommend removing the wood veneer if you see either of these underneath it. Until recently, I would say that your best choice would be my 1st choice: Repair the wood veneer.
But you can actually still remove the wood veneer and end up with a beautiful piece. Just look at my Hand-Painted Faux Barn Door Coffee Table!
I removed the veneer from the top of this table thinking it was hardwood throughout, only to find out that the edges were wrapped in hardwood with a particleboard center (ugh).
Find out how I got it to look like this:
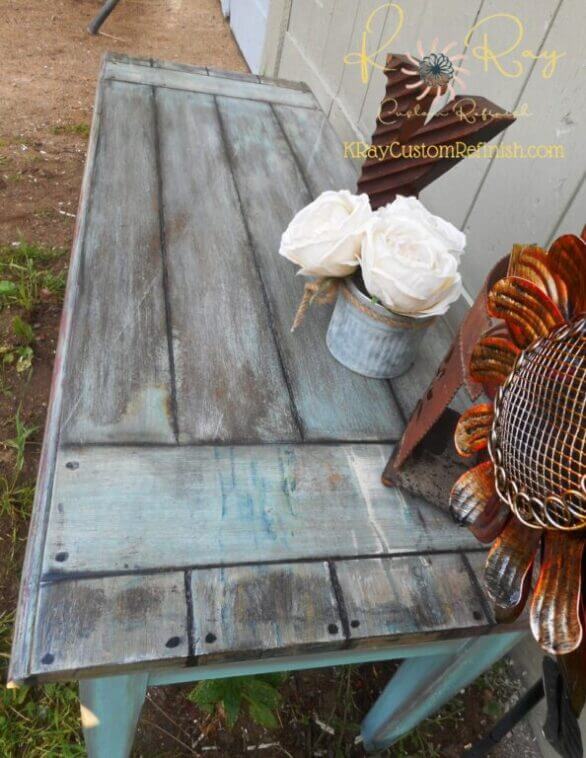
in my post Learn How to Paint Particle Board Furniture After You've Removed the Veneer.
That's a last resort though, you really want hardwood under the veneer if you go through with removing it.
One thing about wood veneer; it protects the hardwood underneath wonderfully. It's normally a pine or poplar wood, but I honestly think those are both some of the most beautiful woods to stain.
Think your piece is a different wood type? Check out my Ultimate Guide To Identifying Wood Types in Furniture and figure it out!
Related: Refinishing Metal Furniture – Things to Know Before You Start
Although, not always the easiest to stain well. If you need help with sanding and staining the hardwood after removing the wood veneer, you can check out my posts How to Sand Wood, Preparing Wood For Staining, and How to Stain Wood.
Now for removing this wretched wood veneer.
Put All of the Removal Techniques You've Learned During Your Research Together for "The ULTIMATE Method For Removing Wood Veneer"
If you've landed on this post, I'm sure you've read through quite a few others by now in search of the best method of taking this stuff off! I also researched for days!!
Nothing worked as well as I wanted it to. Each attempt ended with me swearing and grumbling. Wondering why on earth I decided to do this. Again???
Trust me. I FEEL YOUR PAIN.
Furniture makers obviously didn't bet on someone 20-40 years down the line wanting to rip all this stuff off to expose the "cheap" wood underneath. So they didn't exactly put a secret release button on the stuff. (Boy would that be nice)

The sideboard pictured above was stripped completely with only a hairdryer and a 5 in 1. Including the curved drawer fronts and cabinet doors.
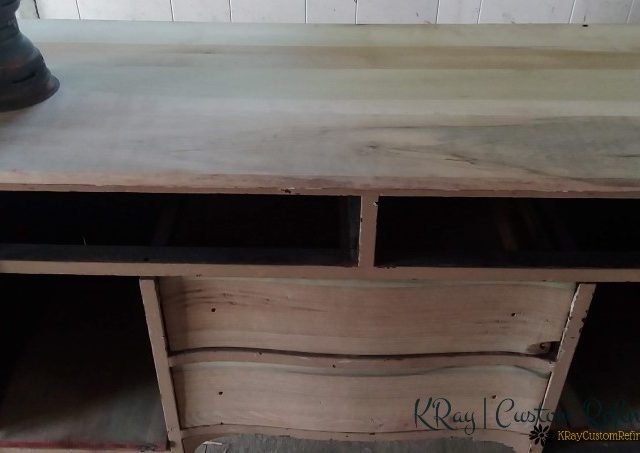
The gorgeous Poplar that was beneath the wood veneer made it all worth it in the end, but I vowed to never spend that much time on a piece again!
So basically, after trying the last "new" method I'd found for veneer removal, and convincing my other half to do all of it for me (no go). WE finally decided, "Screw it, what if we did all of these things together??"
Now it's not the fastest method, but we endured a whole lot less swearing and anger through the process. (all him of course 😉 )
The Ultimate Method For Removing Veneer
(DISCLAIMER: I am in no way a professional on this subject. Please before using torches, irons, or chemicals of any kind be sure to consult a professional if you are unsure about anything. Always wear safety gear and read the warning labels. If you feel uncomfortable using a torch on your piece, the last step of this process can be skipped without a huge difference besides a bit more grunt work.)

How To Remove Wood Veneer From Wood Furniture
Total Time: 1 day and 29 hours
-
Lay damp towels or cloths over top of the wood veneer piece overnight.
Damp, not soaking, but wet enough that the surface of the piece is getting moistened.
-
The next day, remove the damp towels and rewet them.
Place them on top of the piece once again.
-
Using an iron set to cotton or the highest setting – iron over the top of the towels (beware there will be a lot of sizzling and steam.)
Do this slowly, leaving the iron in one spot for say 15 -20 secs at a time. Pay particular attention to the edges where you can slide your putty knife in for removal.
-
After you've sufficiently ironed your piece, remove the towels.
Again, let the piece sit overnight to dry.
-
Now the Torch comes into play. Starting at the edge of the piece, slowly run the torch over the top of the veneer back and forth in a small section.

Make sure you don't leave the torch on one spot for too long or the wood WILL catch on fire.
-
After the veneer is good and hot in that section, take your 6 in 1 tool working with the grain of the wood, stick it between the veneer and wood and slowly lift it off.

After ALL of these steps, they should separate like nothing!
-
If there are still any stuck spots, you can hit the 6 in 1 or putty knife with a hammer at the base.

Make sure you hold the tool parallel with the piece so you don't gauge out the wood underneath.
-
Work your way around the piece with the torch then scraping.
You should be able to remove very large pieces of veneer at once with this method.
Phew! I know that seems like a crazy amount of steps for still scraping off the wood veneer with a putty knife, but trust me, it helps A LOT.
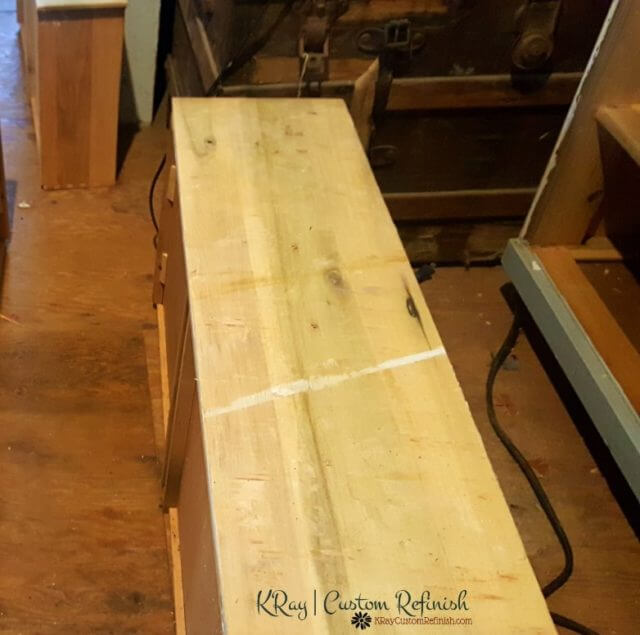
The wood veneer should slide right off when you start scraping. After all of these steps, I scraped a whole dresser in about an hour. But it was a happy hour and that's the most important part!
In Conclusion:
The Possibilities Are Endless! Trashing Your Wood Veneer Furniture Should Now Be Last on Your List
I always vote to save a piece of wood furniture, over trashing it. Wood Veneer or not. I hope that you will do the same!
Whether you remove the wood veneer, repair it, or change the piece up altogether, you will be glad you didn't get rid of it years from now when its beauty is still affecting your life, day after day 🙂
Come Back Next Week For My Post on Staining Wood Filler!
My next tutorial will be all about repairing wood furniture – and not covering it with paint! I will do my best to ensure that as many wood furniture lives are saved as possible.
Or Subscribe to Have it Sent Straight to Your Inbox!
Thanks for reading!

KRay
Source: https://kraycustomrefinish.com/restoring-wood-veneer-furniture/


Posting Komentar